Torsion Springs
1. Close your garage doors. Unplug the opener if you have an automated garage door. Be aware that since the garage door is down, this will mean:
· The springs will be in tension, which can increase the possibility of injuries. Contact a professional if you aren’t confident handling springs under this amount of tension.
· It is essential to have enough light in your garage for you to be able to work comfortably, especially considering the importance of a well-lit space for tasks such as garage door repair. There will be a second alternative in case anything occurs. All of your tools must be in the garage when you start.
2. Secure the door. Install a C-clamp or set of locking levers onto the tracks of your garage door right above the roller at the bottom. This will keep the door from slamming open while you adjust the tension.
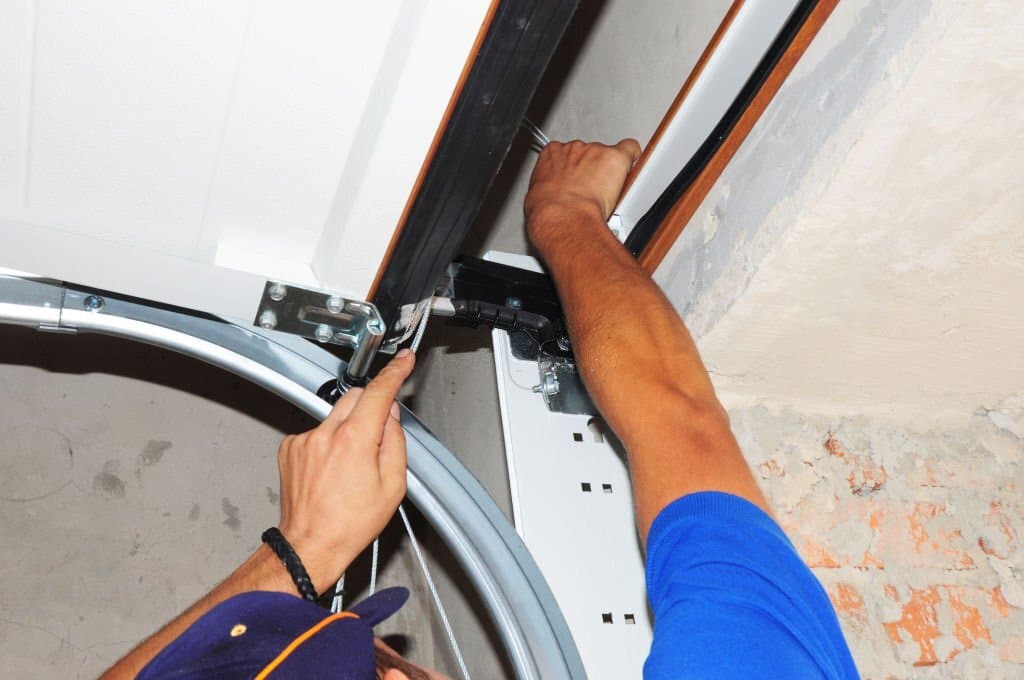
3. Locate your winding cone. From the center plate that is stationary use your eyes and follow the stream until it reaches the point where it stops. Near the end of it, there is an elongated cone that holds it in the right position. The cone will be fitted with four holes that are evenly distributed around it, as well as two set screws utilized to hold the spring into place on the shaft in the center.
To address issues with your garage door, such as adjusting the tension on the spring, you’ll insert a winding bar into the holes on the cone and then turn the cone either in one direction or the opposite, facilitating effective garage door repair.

4 Loosen the set screw. Insert the winding cone or solid rod through the hole in the bottom of the collar for winding. Keep the cone in place by using the bar, then loosen the screws.
· Assess the shaft to see whether there are any depressed or flattened areas where screws are supposed to be fixed. If so, make sure you put the screws back into the same flats once you’re done with the adjustment so that they will be held in place more securely.
5 Prepare to adjust the tension. Place the bars in two successive holes on the winding cone. Set yourself up to the bar’s side in a way that your body and head aren’t getting in the way if the garage door spring fails. Always be prepared to move quickly.
6 Adjust the tension. Be sure that the bars are completely installed, and then manually turn the cone in increments of 1/4. To find a 1/4 turn, twist the bars that wind up 90 degrees.
· To increase the tension of doors that are difficult to open or close quickly, turn the cone upwards (in exactly the same way that the garage door cable passes across the pulley).
· To lessen tension on the door that is difficult to close or opens too fast, then wind the cone downwards in the reverse direction to the direction in which the cable for garage doors is able to pass through the pulley).
· If you don’t know precisely the amount you’ll need to adjust your door, you must go through the steps and then test the door. Repeat as often as you need to and work in 1/4 turns until you get the right tension.
7 Extend the spring. Keep the lowest winding bar in place, and then remove the second bar. Take a measurement of 1/4 inch from the top of the cone (away from the center) and mark the area using a marker or masking tape. The bar remains in the hole at the bottom; lift it up (towards the ceiling) on the bar, then towards your center place. When doing it:
· Keep holding the bar upwards and over, and then tap it using your second bar. Tap it right below the cone that winds. It should be tapped away from the central plate and towards where the marking on the shaft.
· Make sure you tap the bar until you’ve extended the spring until it is at the shaft’s marking.
8 Make sure the set screws are tightened. After you’ve stretched the spring to 1/4 inch, secure it in place using the one bar, and then lock it to your shaft, by tightening the set screws.
· Be sure to change the screws with flats, if any were on the shaft.
9. Repeat on the opposite side. Some torsion spring mechanisms have two springs (one on each side of the center plate). Repeat steps four to eight on the second spring if this is the situation. Torsion springs need to be adjusted in a similar way to ensure balance.
10 Test your door. Unclip all clamps, pliers, or clamps holding the door in place, and then test the door to determine if you’ve set the tension correctly. If not, go back to steps 4 to 10 until you’ve found the correct tension to fix the issue.
· After your adjustments are made, reconnect your opener for an automatic garage door.
11 Lubricate your springs. All springs should be lubricated and hinges, bearings, and metal rollers two times a year using the use of lithium- or silicone-based spray. Don’t use WD-40.